S.M.A.R.T Goals

I first came across this concept back in polytechnic which i was taught how to set a smart goal. Let’s revisit.

S – Specific (Targeting a specific area on where we can improve on or setting the goal on)
M – Measurable (It must have a number or a quantity or a way to look at a numeric indication)
A – Attainable (The goal should be realistic and can be achieved)
R – Realistic (With the current resources, it can be achieved)
T – Timebounded (It must be set with a timeline in mind)

There’s other alternative to the letter such as A may be Assignable/alignment and R to be Results-Based and Reasonable but all in all this framework is useful in setting goals.

Can read more here – https://en.wikipedia.org/wiki/SMART_criteria

ML.NET Part 5 – Machine Learning

As discussed in the previous few tutorials, there are various ways in generating the model required for ML.NET.

To recall, there are 3 ways for us to get the model of ML.NET.

  1. Coding it ourselves
  2. Using Model Builder Tool
  3. Using AutoML via CLI to perform model training and picking the best algorithm.

In the previous tutorials, we have gone advance into using AutoML through CLI to generate the model while picking the best algorithm.

It is time to explore into coding them ourselves.

Before we dive into the programming proper, it is good that there are certain steps and procedures to follow.

By the way – one of the key resources which i found helpful is the tutorials on ML.NET docs – https://docs.microsoft.com/en-us/dotnet/machine-learning/tutorials/ Follow step by step through them and you will find various useful materials to leverage on.

Big steps before programming

  1. Understanding the problem you are solving and choose the tasks involved. ( I will cover this in the next post on how we may want to go about doing this)
  2. Based on the tasks being chosen, it is then important to prepare the data. Not all data came prepared. You will need to know the features and label of the data as well as what is the input and output class. (I will cover this in the next post on what we need.)
  3. Based on the prepared data, you should then split the data for testing and training use. This essentially mean to split the data up into testing and training purposes.
  4. Choose the trainer required in the task. There are various trainers in each tasks, choose the trainer for the task.
  5. Time to write code

ML.NET PART 4 – MACHINE LEARNING

2 weeks ago, in my part 3 post of my ML.NET adventure, i wrote about AutoML through Command Line Interface CLI and how i generated and i wish to expand more on them

What AutoML does and its coverage

As of time of writing, there are 3 that has incorporated into AutoML,

  1. binary-classification
  2. multiclass-classification
  3. regression

I also understand from Microsoft Docs that there will be future machine learning tasks that can be incorporated.

ML.NET CLI input and output
ML.NET CLI input and ouput

Image copied from https://docs.microsoft.com/en-us/dotnet/machine-learning/automate-training-with-cli

The various commands possible

> mlnet auto-train --task binary-classification --dataset "customer-feedback.tsv" --label-column-name Sentiment
> mlnet auto-train --task regression --dataset "cars.csv" --label-column-name Price
> mlnet auto-train --task multiclass-classification --dataset "Training.csv" --label-column-name "Risk" --max-exploration-time 600

Source – https://docs.microsoft.com/en-us/dotnet/machine-learning/reference/ml-net-cli-reference

Output from ML.NET

After running the respective commands for ML.NET, you will noticed 1 folder that will consists of

  1. logs folder
  2. ConsoleApp folder
  3. Model folder
  4. sln file (solution)

Logs – The logs file consists of a full logs with information on all the iterations that have happened while evaluating the algorithms.

ConsoleApp – This application, in C#, allows you to run and make predictions like an end-user applicaiton

Model –
it consists of MLModel.zip which is a serialized model that is ready to use for running predictions
it also consists of the code that was used to generate the model which we can use for retraining purposes.

Quality of the generated model

Understanding more on the quality of the model that was generated.

You will notice –
with Binary Classification – comes
1. Accuracy
2. AUC
3. AUPRC
4. F1-Score

with Multiclass Classification – comes
1. MicroAccuracy
2. MacroAccuracy

with Regression – comes
1. RSquared
2. Absolute-loss
3. Squared-loss
4. RMS-loss

You will be able to see how to understand the metrics via this link – https://docs.microsoft.com/en-us/dotnet/machine-learning/resources/metrics

Bedok Reservoir-Punggol Community Appreciation Night 2019

On 9 June 2019, some of us from the Punggol CC YEC went down to take part in the Community Appreciation Night 2019 organised by Punggol CC Constituency Office.

Punggol CC Community Appreciation Night 2019

I am happy to share that Punggol CC YEC has also clinched the best outreach award for our PAYM Loves Red @ Community YouthSpark 2018 event.

Thank you team!

ML.NET PART 3 – MACHINE LEARNING

In my last post, i covered the steps i have taken to setup the environment required for ML.NET to work. Recall that we need to load the data, prepare the data, train the model and lastly using the model. We are focusing on the training and getting the model today. There are 3 ways for us to get the model of ML.NET.

  1. Coding it ourselves
  2. Using Model Builder Tool
  3. Using AutoML via CLI to perform model training and picking the best algorithm.

In this post, I will focus on using the CLI – command line interface to test and get us the best algorithm. The sample data i am using is from https://archive.ics.uci.edu/ml/machine-learning-databases/00331/sentiment%20labelled%20sentences.zip , more specifically – i am using the Yelp file. if you are not able to get it anymore, you may download from here https://www.limguohong.com/wp-content/uploads/2019/06/yelp_labelled.txt

Data
First, we need to understand this data that we downloaded and what it meant. If you were to open up in excel or a text editor, you will notice that everyline is a text followed by a digit at the back. The digit is binary based – 1 or 0. You will further notice that those whose line are positive and labelled with a 1 as the digit and those whose line are negative are labelled with a 0 and there are 1000 lines of text(reviews).

Problem we are solving via machine learning
In this very specific tutorial post i am making here, we are attempting to train a model to understand if a review is positive OR negative and return the result accordingly. We are using yelp review to train up the model via AutoML CLI.

As you have probably noticed, we are attempting to predict if a new review is likely POSITIVE OR NEGATIVE and this is a binary way of classification and this sheds some light on which tasks should we use.

Which tasks should we use?
We understand that there are 7 tasks in ML.NET right now. Based on the problem we are solving, we will then need to choose which tasks (or sometimes i even call it, classification of problem) will it fall within.

Tasks include

  1. Binary Classification
  2. Multiclass Classification
  3. Regression
  4. Clustering
  5. Anomaly Detection
  6. Ranking
  7. Recommendation

For explanation on what tasks do what – please check the following link – https://docs.microsoft.com/en-us/dotnet/machine-learning/resources/tasks

Now that we understand what tasks are available, we will leave it to AutoML CLI to tell us which Trainer should we use. The concept of Trainer is
Trainer = Algorithm + Task.

In this very specific tutorial we are making here, as the problem is a binary based problem, the best classification to use would be Binary Classification.

Tutorial on Binary Classification – AutoML CLI ML.NET

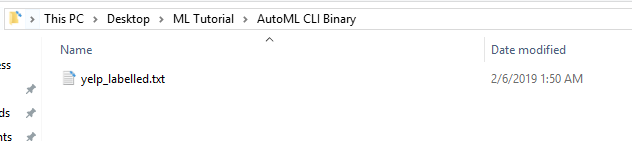
  1. Create a new folder – I created “AutoML CLI Binary”
  2. Place the txt file into the folder.Creating the folder
  3. We need to modify the data abit as it is missing the header to inform the system on which is the LABEL – do note that it must be of boolean type (1 or 0, true or false). As you can see on https://docs.microsoft.com/en-us/dotnet/machine-learning/resources/tasks under Binary Classification, they require the label column data field to be of Boolean. Open up the txt file in excel and add the header “sentiment_label” above the result. Machine Learning - Binary ClassificationMachine Learning - Labeling
  4. Go to the folder and open up command prompt and run this command.
mlnet auto-train --task binary-classification --dataset "yelp_labelled.txt" --label-column-name sentiment_label --max-exploration-time 20

*For explanation, please refer to the end of this post.

  1. After running, you will notice that it mentioned how many iteration it runs and inform which trainer has the best accuracy.

*You may also want to attempt to run the exploration time to be longer and see if they suggest other better algorithm. In my screenshot below, i used 20 seconds and 60 seconds and the result was different.

  1. You will notice a new folder has been generated.

In my next post, i will share how to make sense of the generated file.

ML.NET Command breakdown

mlnet auto-train –task binary-classification –dataset “yelp_labelled.txt” –label-column-name sentiment_label –max-exploration-time 20

Notes about the command.

  1. We are informing mlnet to run the command auto-train which will “Create a new .NET project using ML.NET to train and run a model”
  2. We then inform mlnet the task that we want it to perform by calling –task, at time of writing, ML.NET AutoML CLI has the following supported.
    1. regression
    2. binary-classification
    3. multiclass-classification
  3. We then inform it via –dataset or -d on which file is mlnet supposed to read. Since we are running the command on project root, we just input the file name “yelp-labelled.txt”
  4. We can use either –label-column-name or –label-column-index on column to predict. In this case, we used –label-column-name and inform them to read the column name “label”
  5. We end off the command by informing mlnet in seconds the max-exploration time. In this case we set it to be 20 seconds.

Posts-
ML.NET Introduction – Introduction
ML.NET Part 2 – Machine Learning – Environment setup
ML.NET Part 3 – Machine Learning – Generating Model via ML.NET CLI – Binary Classification